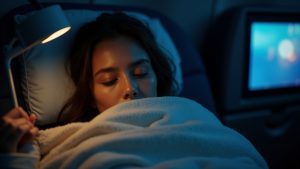
Long flights can turn into uncomfortable marathons when you’re struggling to sleep. You shift around in your seat, flip your thin airline blanket for the cool side, and wonder why the person next to you seems so comfortable. Chances are, they came prepared with a sleep kit.
Here’s the thing about those fancy travel sleep kits you see online. They can easily run you fifty dollars or more, and half the items inside might not even work for you. Maybe you don’t need lavender spray, or that particular eye mask feels wrong on your face. You’re paying for someone else’s idea of comfort.
The good news is that you probably already own most of what you need for a great airplane sleep kit. With a few items from around your house and maybe one quick trip to a dollar store, you can put together homemade travel sleep essentials that work better than the pre-packaged versions. You’ll spend a fraction of the cost and end up with exactly what helps you sleep.
Making your own kit isn’t just about saving money. It’s about building something that fits your personal sleep style. Some people need complete darkness and silence. Others just want a softer place to rest their head. When you create your own do it yourself travel comfort setup, every item earns its spot because it actually works for you.
Think of it like packing a custom toolkit instead of buying whatever’s in the pre-assembled box at the hardware store. You choose what goes in, and nothing gets wasted.
Start by picking the sleep problems you actually have on planes
The biggest mistake people make with airplane sleep kits is throwing in everything they can find. You end up with a bulky bag full of stuff you never use. A better approach is to think back to your last few flights and remember what actually kept you awake.
Most people struggle with the same handful of issues. Noise is the obvious one. Between crying babies, chatty neighbors, and engine hum, planes are loud. Light comes next, whether it’s the reading lamp above you or someone opening their window shade at sunrise. Your neck and head also take a beating without proper support, leaving you with that awkward head-bob that jolts you awake.
Then there are the less obvious problems. Airplane cabins are cold, and that thin blanket they give you rarely does the job. The dry air makes your lips crack and your skin feel tight. And the seats themselves are just uncomfortable, with rough fabric that makes it hard to settle in.
Here’s how to figure out your personal problem list. Think about your last flight when you tried to sleep. What woke you up or kept you from falling asleep in the first place? Was it noise breaking through? Light hitting your eyes? Your head flopping forward? Shivering under that useless blanket?
Write down your top two or three issues. Those are the only ones your kit needs to solve. If noise has never bothered you, skip the earplugs. If you sleep fine in bright rooms, forget the eye mask. Build your kit around what actually disrupts your sleep, not what travel blogs say you should carry.
Make simple light blockers from what you already have
You don’t need to buy a fancy sleep mask to block out the glaring cabin lights on a red-eye flight. A soft scarf or large cotton bandana works beautifully when wrapped gently around your eyes and tied at the back of your head. Choose something breathable like cotton or bamboo fabric, not synthetic materials that trap heat and make your forehead sweaty.
For a truly zero-cost option, try the clean sock method. Take a fresh, soft crew sock and stuff it lightly with tissues or a clean cotton handkerchief. Fold it in half lengthwise and drape it across your closed eyes, then secure it loosely with a hair tie or another soft elastic. It sounds odd, but it blocks light surprisingly well without pressing hard on your eyelids.
If you already own a basic sleep mask that’s just not quite comfortable enough, you can upgrade it at home. Add a thin layer of soft cotton fabric between your skin and the mask, or tuck a folded tissue along the nose bridge to block that annoying light gap. Just make sure nothing presses too hard on your temples or the bridge of your nose, since pressure points can cause headaches mid-flight.
Whatever method you choose, keep it breathable and avoid anything that sits too tight. You want gentle coverage, not a vice grip. If you’ve applied skincare or moisturizer before your flight, let it absorb for a few minutes before putting anything over your eyes to avoid smearing product everywhere.
Pack your homemade light blocker in a small zippered pouch or clean sock to keep it fresh in your carry-on. That way it stays clean and you can find it easily when the cabin lights finally dim.
Handle cabin noise with budget-friendly ear options
Airplane cabins are loud. Between the engine hum, crying babies, and chatty neighbors, getting quiet enough to sleep can feel impossible. But you don’t need fancy noise-canceling headphones to solve this problem.
You have two basic strategies: blocking the noise or covering it up with better sounds. Foam earplugs block noise by creating a physical seal in your ear canal. They’re cheap, available at any drugstore, and surprisingly effective. White noise or calm music masks the annoying sounds by giving your brain something more pleasant to focus on.
The trick with foam earplugs is getting them in correctly. Most people just shove them in and wonder why they don’t work. Instead, roll the earplug into a tight cylinder, reach over your head with your opposite hand to gently pull your ear up and back, then insert the plug and hold it while it expands. Done right, they should feel snug but not painful.
Comfort matters more than you’d think. Some earplugs feel fine for twenty minutes but start hurting after an hour of pressure. Buy a few different types and test them before your trip. If foam bothers you, try the softer silicone putty kind that molds to your outer ear instead of going deep inside.
Keep your earplugs clean by storing them in a small container or ziplock bag, not loose in your pocket. Toss in a spare pair because they’re easy to drop during a groggy bathroom trip at thirty thousand feet. And if you’re using earbuds for white noise, make sure your phone is in airplane mode so you’re not draining battery or getting notifications that jolt you awake.
Create neck and head support without a pricey travel pillow
The biggest problem with sleeping upright isn’t just discomfort. It’s that your head keeps falling forward or to the side, yanking you awake every few minutes. Good neck support means your head stays roughly upright without effort, and your jaw stays loose instead of clenched.
The easiest solution is already in your bag. Take a hoodie or soft jacket and roll it into a thick sausage shape. Wrap it around the back and sides of your neck like a collar, then tie the sleeves loosely in front to hold it in place. This gives you a cushioned barrier that stops your head from dropping forward. The fabric is soft, so it won’t dig into your skin the way some stiff travel pillows do.
If you’d rather use a scarf, fold it lengthwise a few times to make it thick, then wrap it snugly around your neck. You want it firm enough to provide resistance, but not tight enough to feel restrictive. Think of it like a gentle reminder to your neck muscles, not a brace.
Another option is stuffing a small tote bag or drawstring pouch with a sweater or spare clothes. Close it up and wedge it between your neck and the seat. You can adjust the amount of stuffing to get the height just right.
Before you leave home, test your setup in a kitchen or dining chair. Sit upright without leaning back. Close your eyes and let your head relax. If it drifts forward or sideways more than an inch or two, add more padding or adjust the wrap. Your goal is to feel cradled, not propped up like you’re wearing a medical collar.
Build a warmth plan for cold cabins using layers you already own
Airplane cabins can swing from stuffy to freezing in minutes, and airline blankets aren’t always available when you need them. The trick is bringing a few simple layers that pack small but keep you comfortable when the temperature drops mid-flight.
Start with your feet. Cold feet make it nearly impossible to fall asleep, so tuck a pair of warm socks into your personal item bag. Choose thick cotton or wool socks that feel soft against your skin. You can slip them on once you’re settled in your seat, right over your regular socks if needed.
A lightweight scarf does double duty as your best defense against cabin chill. Wrap it around your neck to stop cold air from creeping down your collar, or unfold it across your lap like a small blanket. Look for scarves made from soft jersey, cashmere blends, or fleece that won’t feel scratchy against bare skin. Avoid anything with sequins or rough textures that might irritate you while you’re trying to rest.
Pack one thin sweater or hoodie that compresses easily. Roll it tight and keep it in the top of your bag, not buried under everything else. When the cabin temperature drops two hours into your flight, you want to grab it without disturbing your seatmate or digging through your entire bag.
The key to all of this is keeping everything accessible. Put your warmth layers in your under-seat bag, not in the overhead bin. Use a gallon-size ziplock bag or packing cube to keep them together in one spot. When you need them, you’ll know exactly where to reach.
Add a tiny ‘dry air’ comfort kit from bathroom basics
Airplane air is notoriously dry. Like, desert dry. Your lips crack, your hands feel papery, and your nose gets that weird tight feeling a couple hours into the flight. The good news is you probably already own everything you need to fix this.
Start with a small clear zip pouch, the kind you might get free with a makeup purchase or buy at the dollar store. This keeps everything contained and easy to grab when you need it. Plus, if you’re carrying liquids in your hand luggage, having them visible and organized makes security checkpoints much smoother.
Grab a lip balm you already like and use regularly. Skip anything with strong mint or fragrance that might bother your seatmate in close quarters. The same goes for hand cream. Decant a little into a tiny travel container if you have one, or just bring a small tube. You don’t need much.
If you’re someone who gets a stuffy nose or dry nasal passages when flying, a small saline nasal spray can help. Just plain saltwater, nothing medicated. Same idea with eye drops if your eyes tend to feel scratchy. Make sure any liquids fit within the usual airplane rules, which means containers under 100ml or 3.4 ounces.
The water part matters too, but you don’t need to buy fancy bottles. Bring an empty reusable water bottle through security and fill it at a fountain after. Staying hydrated from the inside helps almost as much as the creams and sprays on the outside.
Keep the whole kit simple and small. You’re aiming for comfort, not a full skincare routine at 30,000 feet.
Use small hygiene items to feel comfortable enough to sleep
There’s something about feeling grimy that makes it nearly impossible to relax on a plane. Your face feels oily, your breath tastes stale, and you’re suddenly hyper-aware of every uncomfortable sensation. A few simple hygiene items can change that.
Start with toothbrush wipes or those little disposable finger brushes you can find at most drugstores. They’re not as good as a real toothbrush, but they’re small enough to tuck anywhere and make a huge difference in how you feel. If your mouth feels fresh, you’ll be amazed how much easier it is to settle in.
Face wipes are another game-changer. A quick wipe-down removes that airplane air feeling and helps you feel human again. Look for unscented versions whenever possible. In the enclosed space of a plane, even a light fragrance can bother the person next to you or trigger a headache for yourself.
Toss in a travel-sized deodorant wipe too. Nobody wants to worry about how they smell when they’re trying to sleep, and a quick refresh takes ten seconds. Add a small pack of tissues for wiping hands or the occasional spill.
If you wear a face mask for any reason, bring a spare. Wearing the same one for hours gets uncomfortable fast, and swapping to a fresh one halfway through a long flight feels surprisingly good.
Here’s the key detail nobody mentions: bring a small ziplock bag for your trash. Sitting with used wipes bunched up in your seat pocket is gross, and you can’t always count on the flight attendants coming by when you need them. A dedicated trash bag keeps everything tidy and contained until you can properly dispose of it.
Pack the kit so it’s easy to grab in the dark
The best sleep kit in the world is useless if you can’t find what you need when the cabin lights go down. Choose one small pouch that fits easily in the seat pocket in front of you. This keeps everything within arm’s reach without needing to dig through your overhead bag while half-asleep.
Think about when you’ll actually use each item. Your eye mask and earplugs go right on top because you’ll need them as soon as you’re ready to sleep. Lip balm and hand lotion can sit in the middle since you might want them during the flight. A mint or gum for landing goes near the bottom. This simple order means you’re not dumping everything out to find one thing.
Here’s a trick that makes a real difference: bring two of anything tiny. Pack an extra pair of earplugs or an extra eye mask. They take up almost no space, and you won’t panic if one earplug falls under the seat at midnight. Trust me, you don’t want to be crawling around on an airplane floor in the dark.
Skip anything with crinkly packaging. Rewrap items in soft cloth or put them in a small fabric pouch instead of plastic bags. Your seatmate will appreciate not hearing you rustling through noisy wrappers when they’re trying to sleep too.
Keep your pouch simple and flat. Bulky organizers with lots of compartments sound nice, but they don’t fit well in seat pockets and make everything harder to access. One soft zippered pouch does the job perfectly and slides into that pocket every time.
Customize comfort with one or two low-cost upgrades
You don’t need to buy everything new to sleep better on planes. Most people already own the basics. The trick is figuring out which single item causes you the most trouble, then spending a few dollars to fix just that problem.
If noise keeps you awake, better earplugs make a huge difference. The foam ones from the drugstore work fine for some people, but if they fall out or feel uncomfortable, try silicone putty earplugs instead. They mold to your ear shape and stay put. Test them at home first while watching TV or reading. If you can’t stand things in your ears at all, skip this entirely and focus elsewhere.
A scratchy eye mask is another common complaint. If the one you have now lets in light around the edges or puts pressure on your eyelids, look for a contoured mask. These have little cups that rest around your eyes instead of pressing on them. Again, wear it around the house for twenty minutes. If it annoys you after that long, it’ll drive you crazy on a six-hour flight.
Neck pillows divide people sharply. Some travelers swear by them. Others find them bulky and useless. If you’ve never tried one and you wake up with a sore neck after flights, an inflatable version costs less than ten dollars and packs flat. Blow it up at home and sit in a chair for half an hour. That’ll tell you everything you need to know.
The point is to upgrade only what actually bothers you. One good fix beats five mediocre accessories you’ll leave in your bag.